October is when most people in the UK switch on their heating systems for the first time after the summer. This article covers the programming and settings you can use to help your electric heating system handle the intermittent, highly variable temperatures of October and November, which is different from “set-it-and-forget-it” deep winter use.
Times have changed and your radiators are SMART
Unlike 10-15 years ago, when controlling your heating was done using a set of fairly simple physical controls, today’s modern electric heating relies on advanced controls (timers, thermostats, open-window detection). This article will show you how to leverage the exact features you need to save money immediately.
Don’t rely on last winter’s program
You may have last used your program during a cold spell at the end of March or start of April when we can often get snow in Scotland. Copying or switching to this program might mean that you have more heat than you’ll need this month. Some of the predicted temperatures for October hit 15-17 degrees, so by relying on last winter’s settings, your home will be too warm – making your bill higher than necessary.
We recommend setting up intermittent heating (e.g., only from 6:30 AM to 9:00 AM and 5:00 PM to 9:00 PM), rather than running it all day, like during mid-winter.
Calibrate your thermostat (the hidden efficiency tip)
Why calibration matters
During the deep winter, a slight inaccuracy (say, 1°C off) might be less noticeable because the heating runs constantly. However, in autumn, when you’re only trying to maintain a comfortable temperature during short periods, this error is more important:
- Wasted energy: If your radiator’s thermostat thinks the room is 19°C when it’s actually 20°C, it will heat unnecessarily, costing you money.
- Poor comfort: If the thermostat thinks the room is 21°C when it’s only 20°C, the heater won’t come on when you need it, leading to a chilly start to the day.

How to check for accuracy (the calibration check)
You can’t “calibrate” every electric heater, but you can check if its reading is accurate and adjust your settings accordingly.
- Get a reference thermometer: Place a reliable, digital room thermometer (a dedicated one, not a phone app) next to your electric radiator or on an adjacent wall (not in direct sunlight or a draft).
- Wait for stability: Allow the room temperature to stabilise for at least 30 minutes with the radiator off.
- Compare readings: Look at the temperature displayed on your electric radiator’s screen (or heating control unit) and compare it to the reading on your reference thermometer.
What to do if the readings differ
If there is a difference, you have two courses of action:
- The ‘Offset’ solution (if your heater supports it): Many modern, high-end electric radiators (like those from Ecostrad or Dimplex) have a calibration or offset setting in the advanced menu. If your radiator reads 2°C higher than the room thermometer, you can set the offset to −2°C. This tells the radiator’s sensor to subtract two degrees from its reading, ensuring it now operates based on the true room temperature.
- The ‘Manual Offset’ solution (If your heater does not support calibration): If your unit lacks an offset function, you must manually compensate.
Here’s what action to take in each scenerio:
- Heater reads low: If your radiator reads 19°C when your thermometer reads 20°C (it’s under-reporting the heat), you should set your desired temperature 1°C lower (e.g., set the radiator to 19°C to achieve 20°C).
- Heater reads high: If your radiator reads 21°C when your thermometer reads 20°C (it’s over-reporting the heat), you should set your desired temperature 1°C higher (e.g., set the radiator to 21°C to achieve 20°C).
By performing this simple check, you ensure that when you program your radiators to maintain 20°C during your scheduled hours, you are actually getting 20°C and not accidentally heating to 21°C or 22°C and wasting energy.
Leverage the ‘Boost’ function correctly
The “Boost” function is one of the most misunderstood features of modern electric heating and, if used incorrectly, can waste money.
For electric heating, the Boost function offers a way to temporarily override the programmed schedule without permanently altering your efficiency settings. It’s designed for temporary comfort, not daily use. It is most efficient when used as a short, timed burst to quickly correct an unexpected drop in temperature or meet an immediate need for warmth.
The Golden Rule: Use Boost for an hour or two; adjust the thermostat for the whole season.
Here are some example scenarios where boost can save you money:
- Coming home early: You get home at 4:00 PM, but your schedule starts at 5:00 PM. Instead of manually turning the radiator to ON (and potentially forgetting to turn it off later), hit the Boost button for 60 minutes. The radiator will run at full power until your comfort temperature is reached, or the 60 minutes are up, and then switch back to its scheduled off or setback mode.
- The sudden cold snap (autumn weather): It’s an unusually chilly Tuesday morning, but your heating is currently off. Instead of manually extending your schedule until noon, use a 90-minute Boost. This gives you the temporary heat you need without altering your energy-saving schedule for the rest of the week.
- Warming a specific room (zonal control): You decide to read in the spare bedroom, which is set to a low temperature of 16°C. Rather than changing the programming for that room, hit Boost on that radiator for the duration of your reading session.
Efficiency tips for the Boost option
- Specify the time and temperature: Many modern radiators allow you to set the duration (e.g., 30, 60, 90, 120 minutes) and the target temperature (e.g., boost up to 21°C). Always select the shortest time and lowest comfortable temperature possible for your need. A one-hour boost is usually sufficient for a single room.
- Know your unit’s boost behaviour:
- Electric radiators (direct heat): Boost usually overrides the schedule for a set time, running the heater until the boost temperature is met, or the timer runs out.
- Electric storage heaters (less common): If you have an older storage heater, the ‘Boost’ function draws power from the grid at the current peak-time rate (the most expensive rate) to provide heat immediately, as the stored heat is depleted. Use this only as an absolute last resort to avoid high peak-rate charges.
- Set your program low: The ability to use the Boost function correctly means you can afford to be more aggressive with your standard, scheduled temperatures. Keep your main program at the lowest comfortable temperature (19°C- 20°C), and use Boost for those occasional times you need a quick 21°C spike. This prevents continuous, unnecessary energy usage.
Check and adjust your open-window detection
The method for checking and adjusting open-window detection primarily depends on the specific brand and model of your electric radiator or smart thermostat system. However, there are general steps and common settings you can look for.
The open-window detection feature is a crucial energy-saving technology that temporarily pauses heating when it senses a sudden drop in room temperature, which typically indicates an open window or door.
How to check the Open-Window Detection feature
The most direct way to check if the feature is working is to simulate an open window:
- Ensure the heating is active. Set the radiator to a high enough comfort temperature that it is actively heating the room.
- Open a window or door. Open a window in the room where the radiator is located. The more sudden the temperature drop, the faster the detection will trigger.
- Wait for the response. After a short period (usually a few seconds to a few minutes, depending on the model), the radiator should:
- Stop heating (the heat indicator will turn off).
- Display an icon on its screen (often a small window, door, or “Open Window” text).
- Switch to a low-energy mode, such as frost protection (e.g., 7°C).
- Close the window and wait for the system to automatically resume its normal program. Some systems will resume immediately upon sensing a temperature rise, while others may wait for a pre-set duration (e.g., 15 or 30 minutes) to pass.

If the radiator stops heating and displays a window icon, the feature is working correctly. If a window was not open but the feature still triggered, you may need to check for a severe draught near the radiator.
You can adjust the Open Window Detection feature with the controls for your radiator directly or by using the app (applies to most modern radiators). You can always refer to your product’s specific user manual, but please do contact us if you need help.
Don’t forget the towel rails: setting your secondary heating
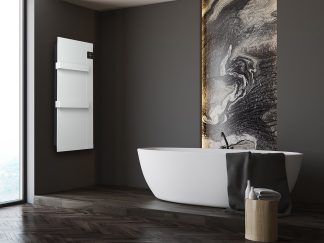
Heated towel rails are highly effective as a secondary heat source and for year-round towel drying:
- On-demand warmth: Electric towel rails provide a quick, cosy hit of heat in a room like the bathroom without having to fire up the main central heating boiler for the entire house.
- Banish the chill: They take the initial chill off a cold, tiled bathroom floor and air, making it more comfortable to step out of the shower.
- Towel hygiene: Towel rails rapidly dry towels to prevent musty odours, mildew, and bacteria growth, which is a major benefit in damp environments.
- Humidity control: The gentle heat helps to manage overall humidity in the area around the rail, reducing the risk of mold and mildew on walls and grout.
- Energy efficiency: Using an electric rail for 1-2 hours to dry a towel is far more energy-efficient than running a tumble dryer for the same small load.

Towel rail efficiency: timer and boost Functions
When it comes to electric towel rails, the key to energy-efficient, especially with electric or dual-fuel models, is not to leave it on all the time, but to use the smart features most modern units include.
- Boost Mode (e.g., “Boost 2h”): This function activates the heating element to maximum power for a short, set period (typically 2 hours), regardless of the set temperature. It’s perfect for quickly heating the room and drying towels after showering or bathing. Once the time is up, it switches off or returns to a lower Comfort mode.
- Timer Mode (e.g., P1/P2 or Timer24/Timer12): This is a programmable, repeating sequence designed for daily use. Set the timer to activate 30-60 minutes before your family’s morning shower and run for two hours. This ensures warm towels and a comfortable room just when you need them, then turns off automatically.
- Thermostatic Control (Comfort Mode): Allows you to set a desired temperature (e.g., 45∘C or 55∘C). The element will only draw power when needed to maintain that temperature, making it more energy-efficient than a simple ON/OFF switch.
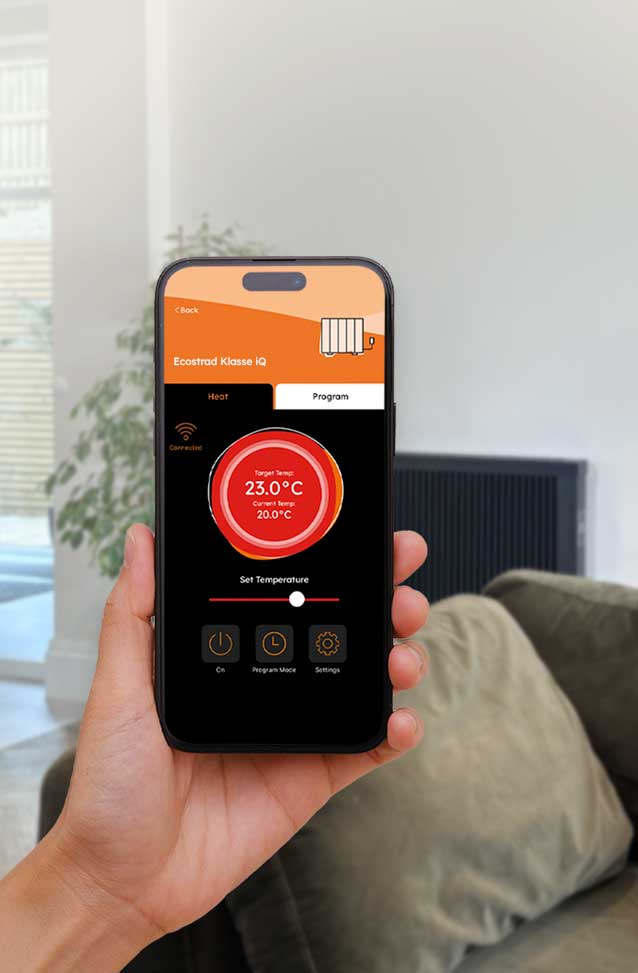
- Smart Control: Many modern rails can be controlled via an app or Wi-Fi, allowing you to turn it on remotely or set complex schedules for maximum cost savings.
-

Farho Electronic towel rail
£750.00 Select options This product has multiple variants. The options may be chosen on the product page -

Farho Nova Digital
£750.00 Select options This product has multiple variants. The options may be chosen on the product page -

Ecostrad iQ WiFi Heating Element
£750.00 Select options This product has multiple variants. The options may be chosen on the product page -

Farho Towel Bar by @Ridea
£750.00 Select options This product has multiple variants. The options may be chosen on the product page -

Farho Control app
£0.00 -

Ecostrad Fina-E
£750.00 Select options This product has multiple variants. The options may be chosen on the product page -

Farho Onis towel rail
£750.00 Select options This product has multiple variants. The options may be chosen on the product page -

Dimplex Hub
£158.78 -

Dimplex chrome towel rail
Price range: £174.73 through £263.46 Select options This product has multiple variants. The options may be chosen on the product page


